
This table was conceived many years ago when I cut a particular red oak tree from the Mississippi property into slabs on my Lucas sawmill. As soon as the slabs were cut and the beautiful grain revealed, I knew where these were going. After years of tripping over these slabs in my shop, I finally lifted them up onto the workbench and began the project.
I’ve always been intrigued by the trestle design. It’s utilitarian, super strong and all comes apart with the removal of a couple of wooden wedges at each end of the base/trestle. As has been my tendency lately, my goal was to build this table without nails, screws or any type of modern fasteners. The only modern convenience that I employed was the use of Titebond wood glue. All of the base joints were mortise & tenon construction and the table base connection is accomplished with large wooden dowels. The sheer weight of the top (around 400 lbs.) keeps it firmly planted on the base.
The two center slabs were perfectly book-matched and complemented each other nicely. A local mill here in Albuquerque planed the slabs down to 2.5″ thickness and I trimmed the “live edges” off to square off the slabs before construction. The base and trestle components were all made from a single 12″ x 12″ timber cut from another red oak. These boards were milled with an Alaska chain saw mill and planed at the same shop along with the slabs.
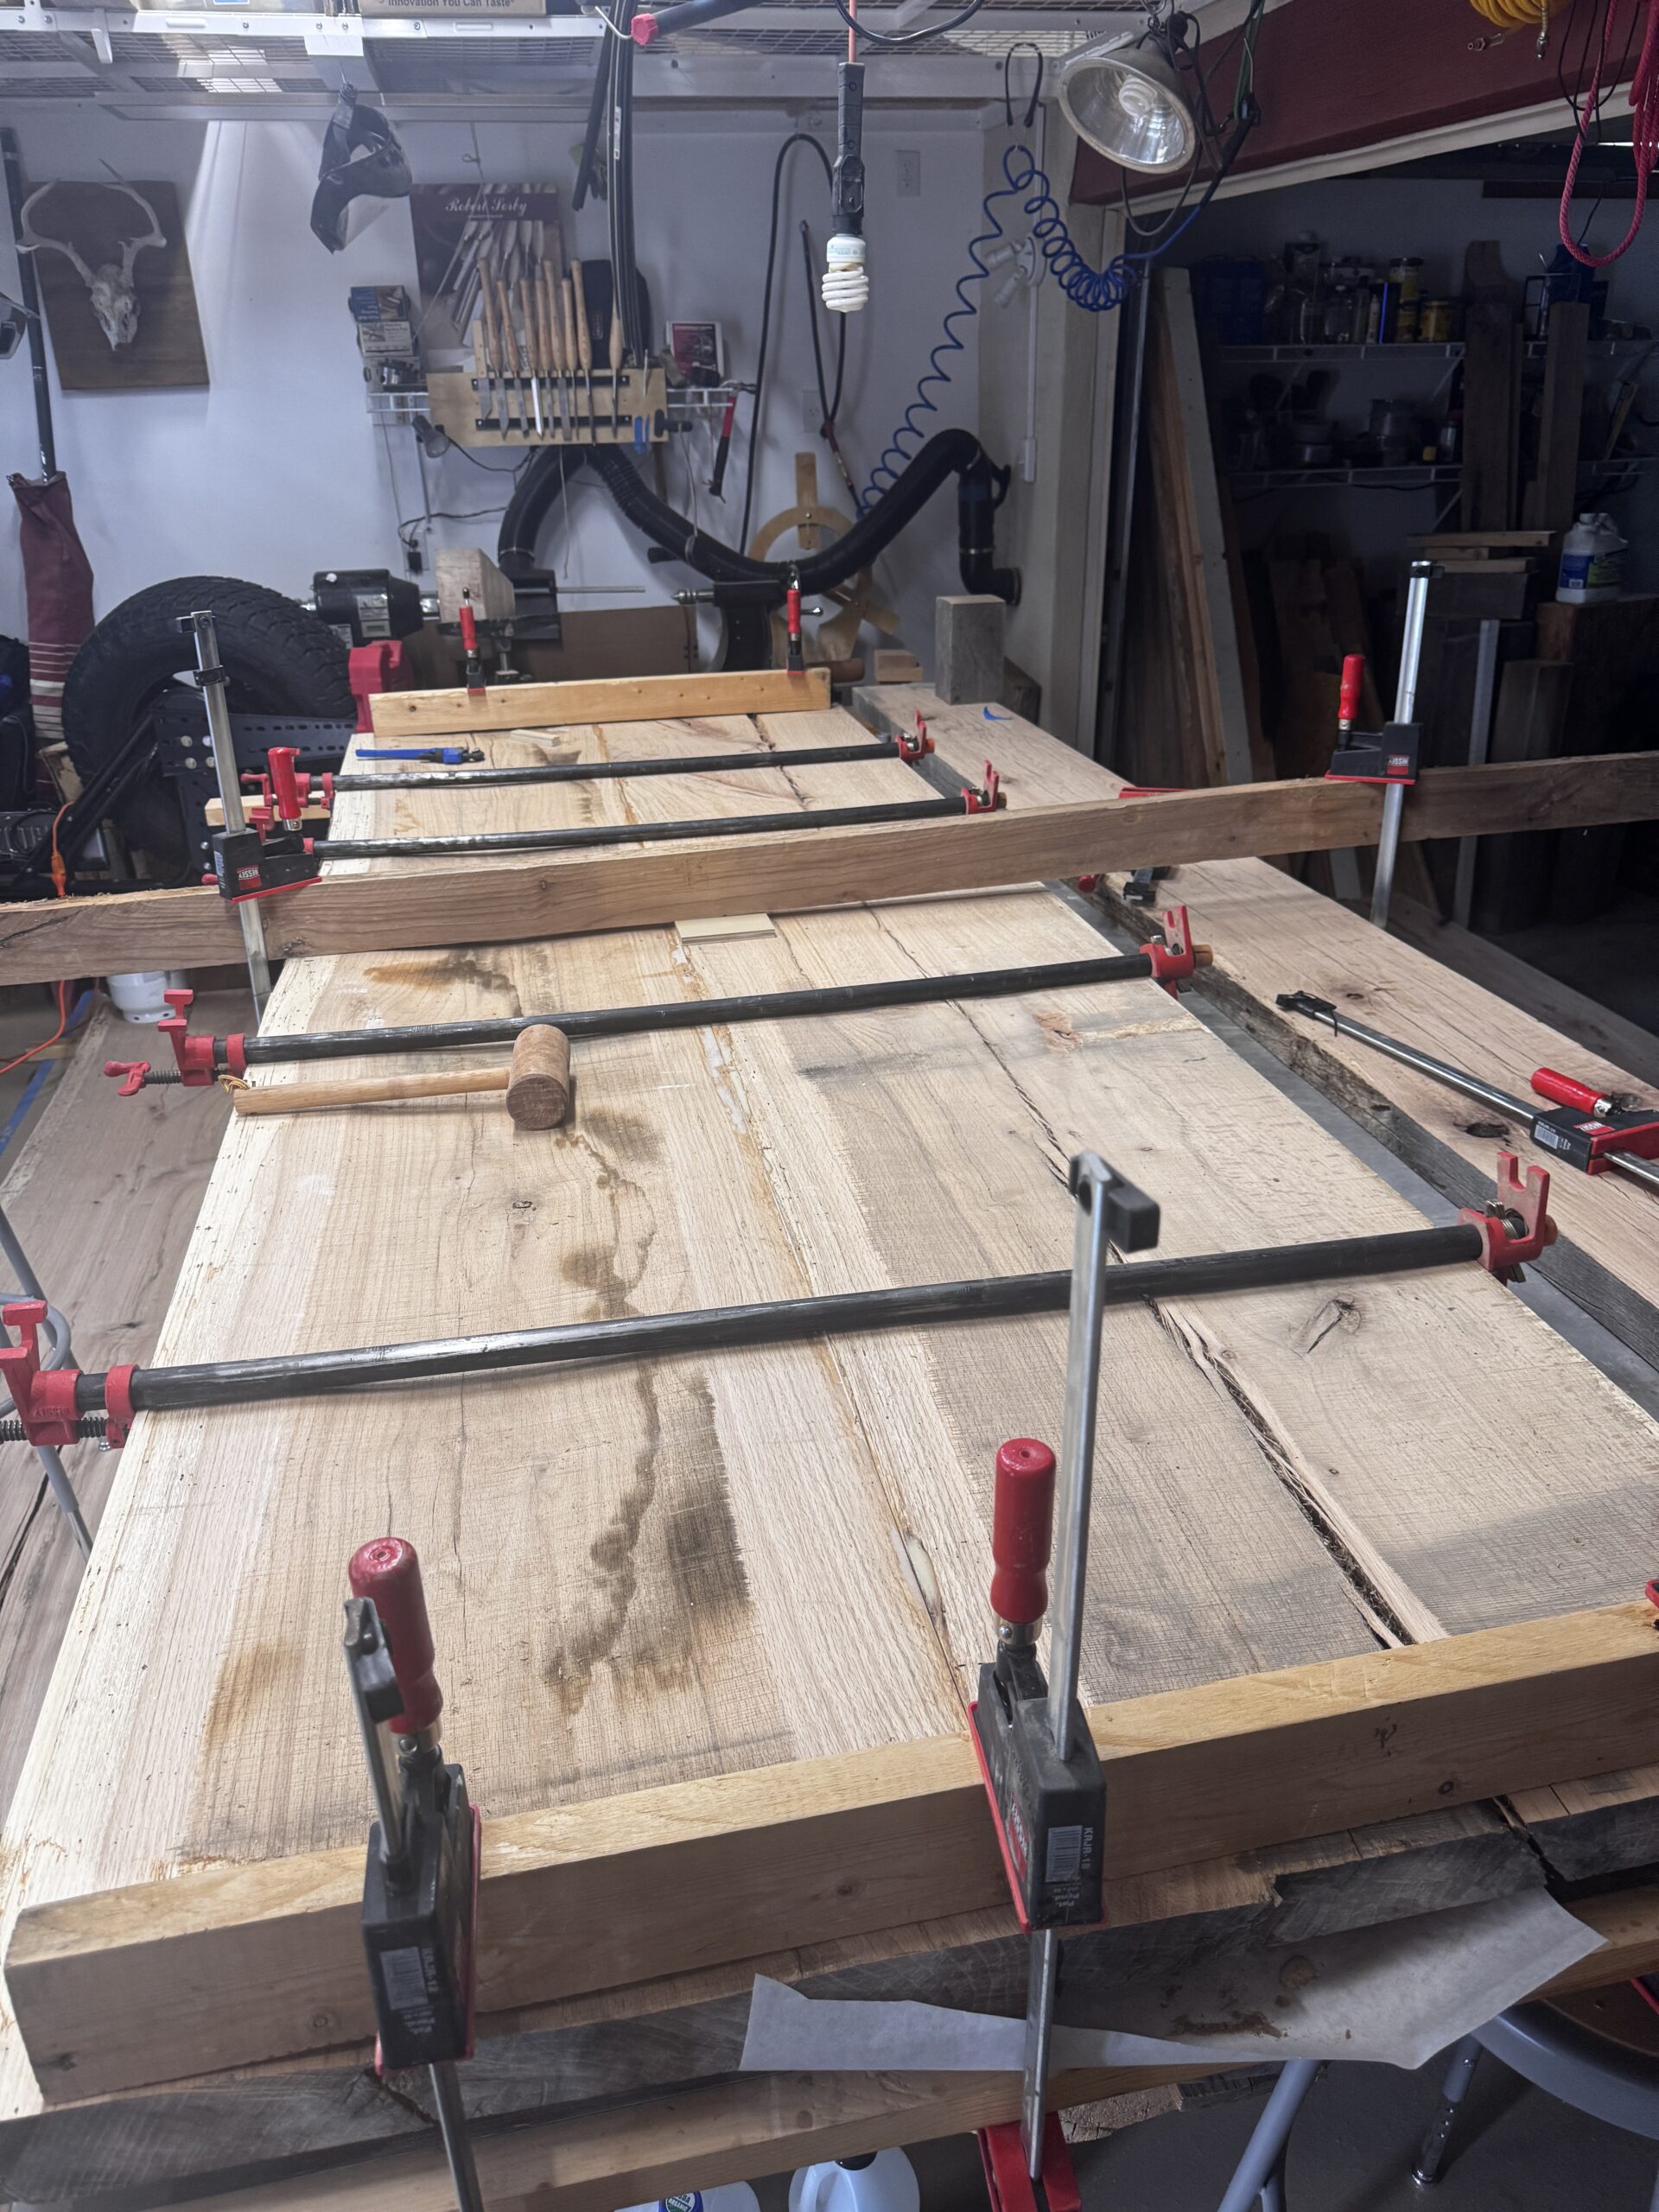
Initial glue-up of the slabs was done bottom side up. Generally the bottom is finished prior to flipping and finishing the top.
Here you can see both large and small splines that I incorporated/glued into the underside of the table. The long splines will give additional support where the top sits on the legs. Large cracks were filled with epoxy at this point and the bottom of the table was sealed with a couple of coats of polyurethane finish.
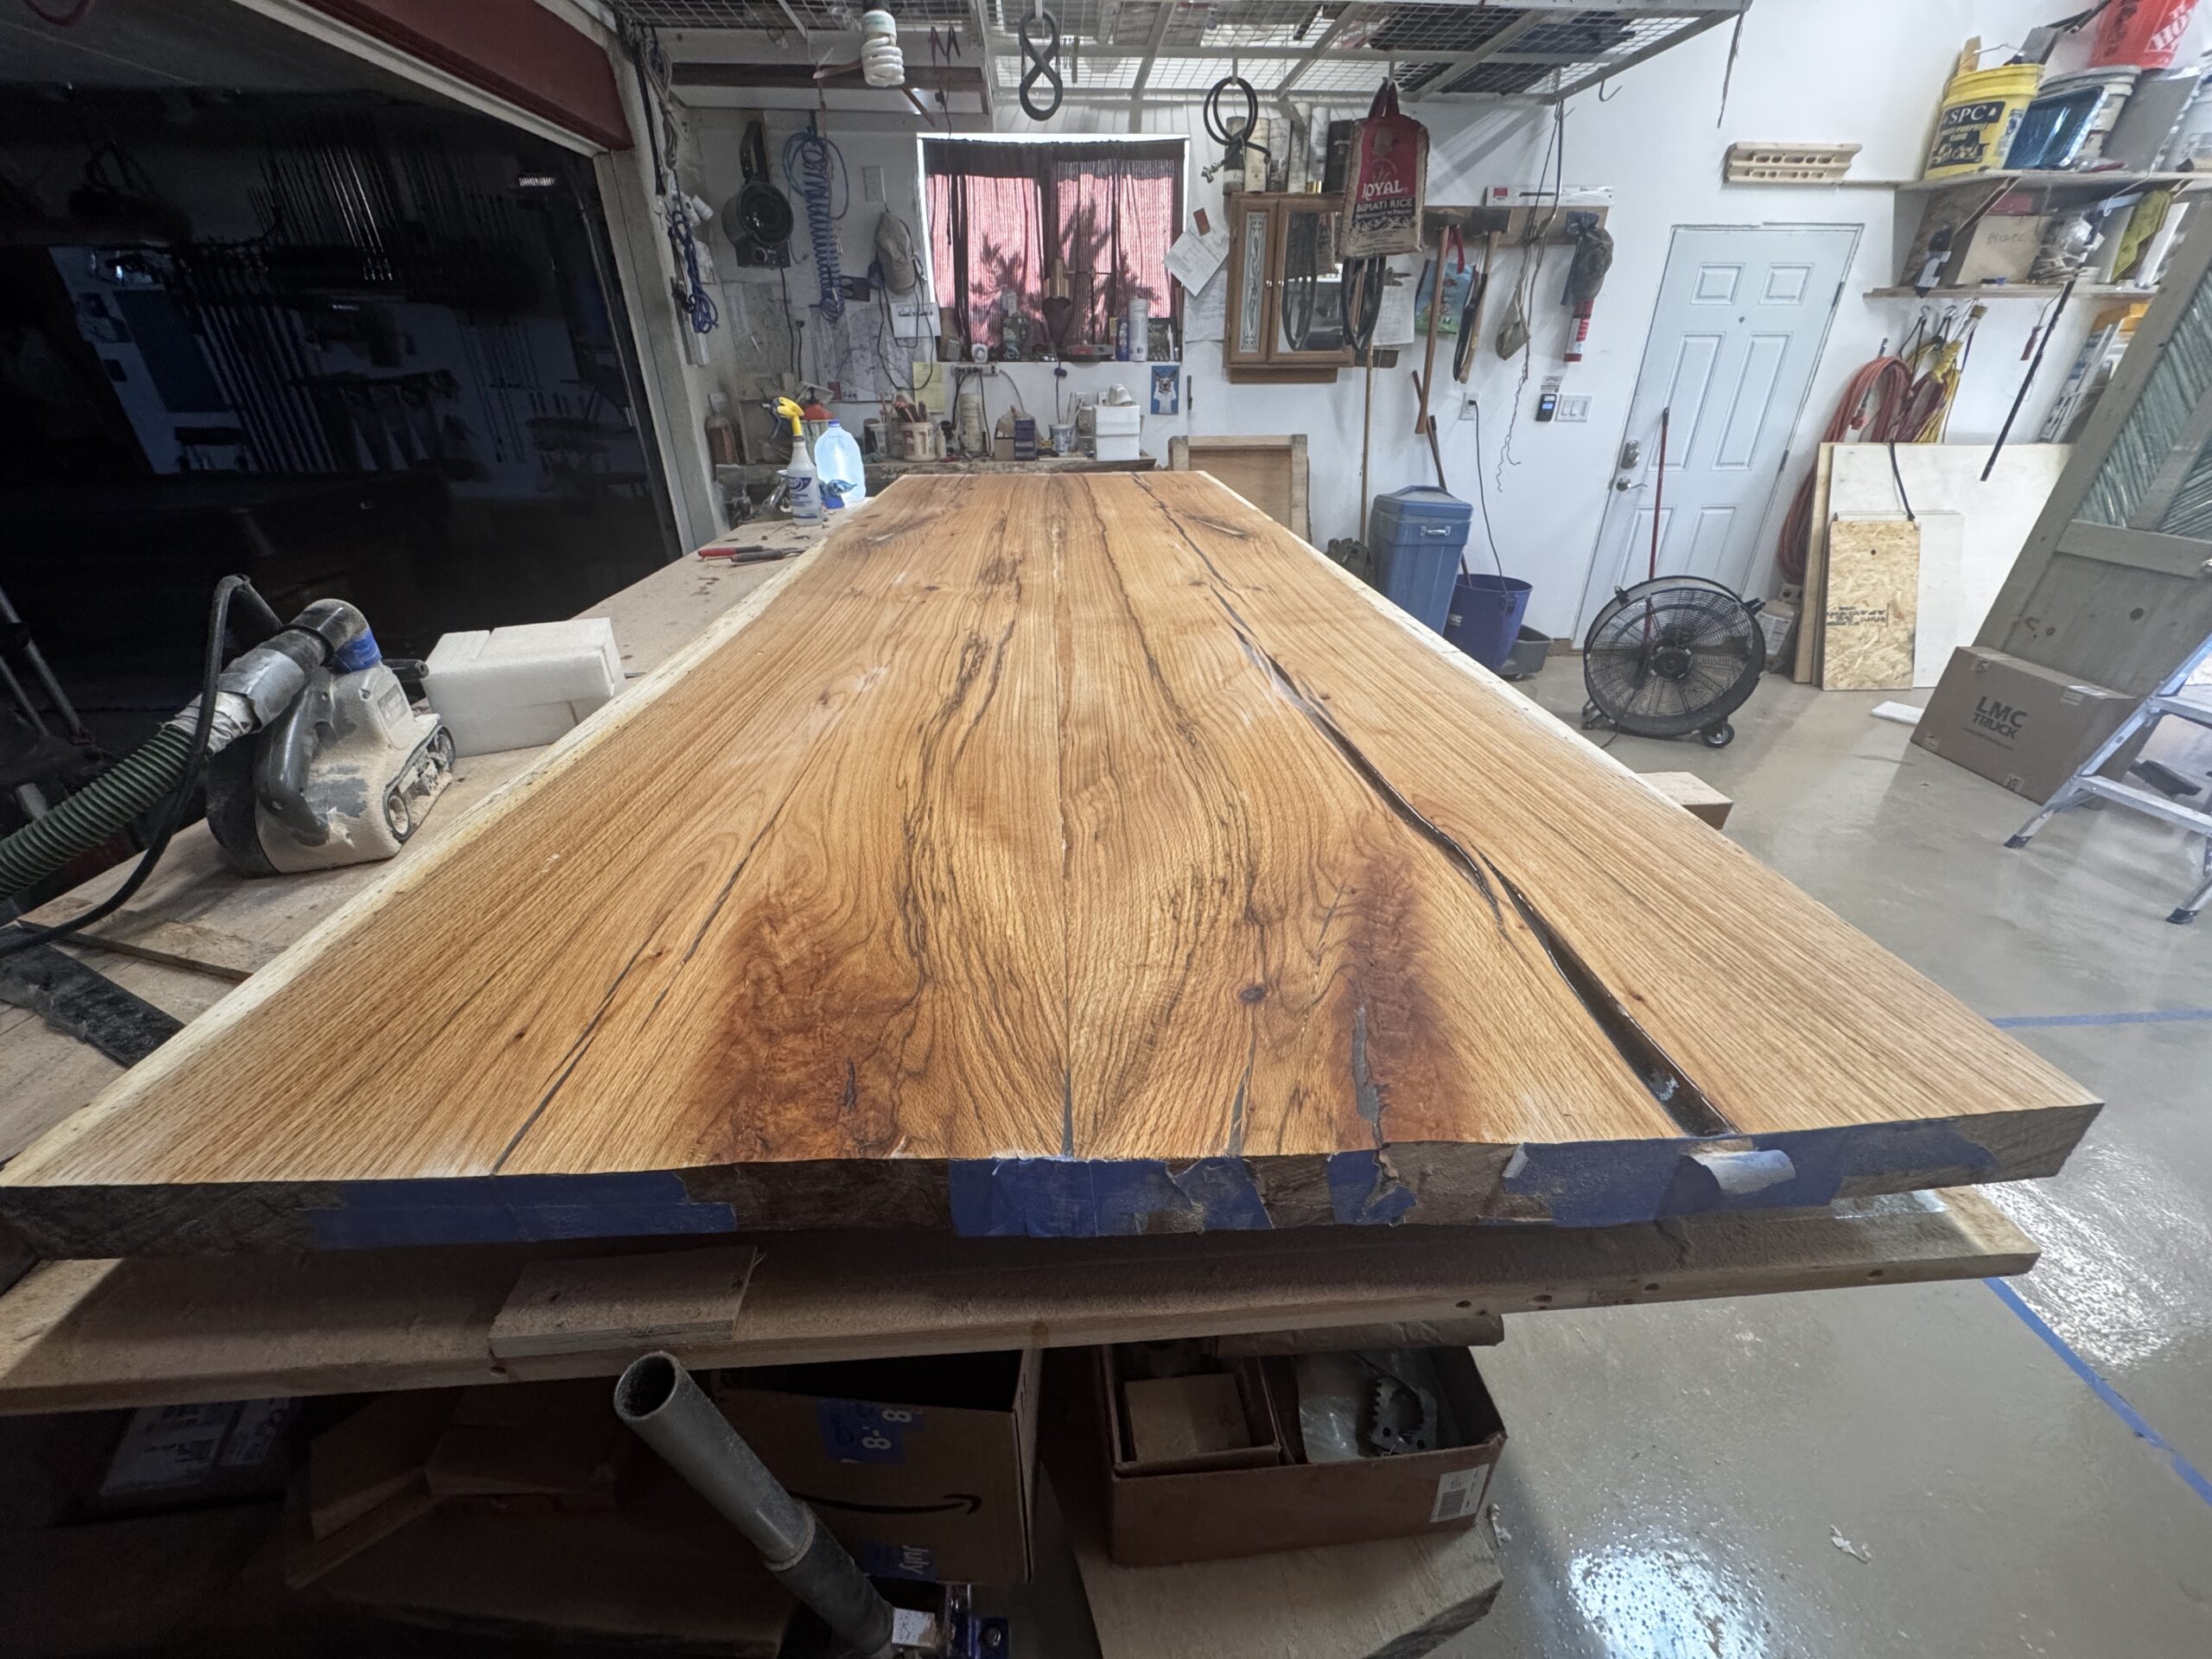
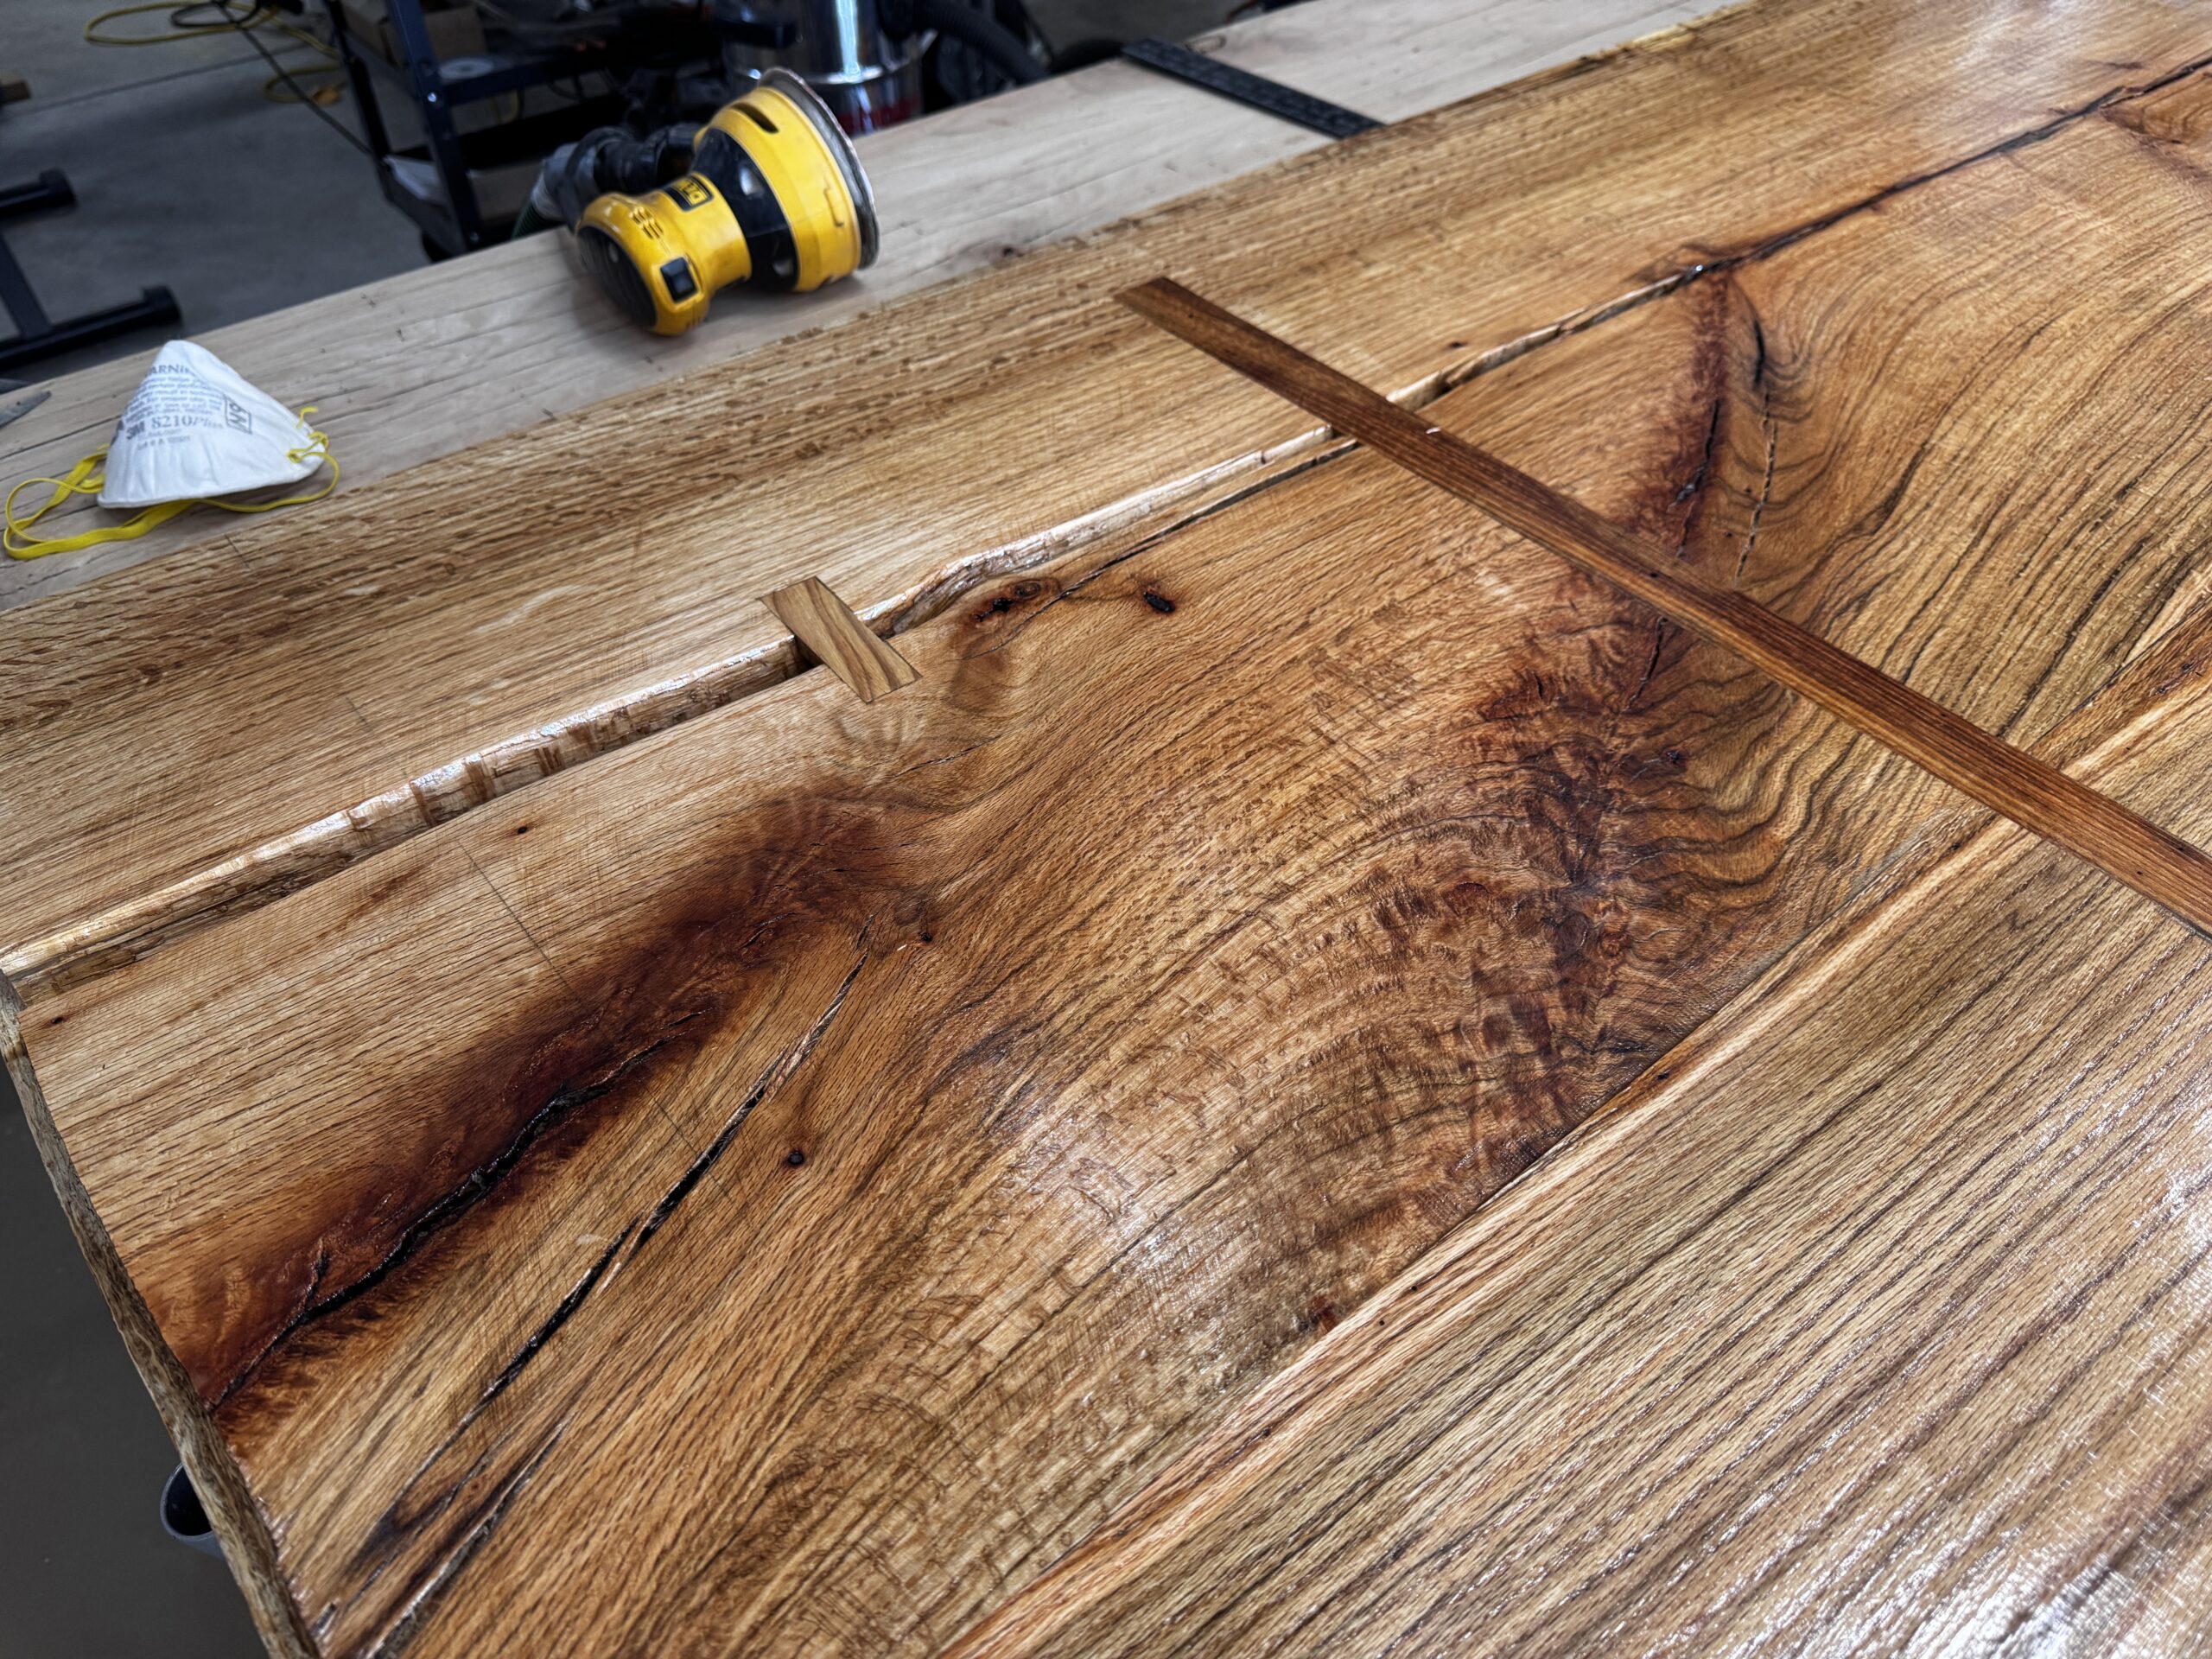
Top has been flipped and starting to sand the final surface of the table. Zoom in and you can see the book matched grain. These two slabs were cut one after the other (the right side was dead center of the log as indicated by the giant split in the middle of the tree) and then opened like a book to reveal matching grain patterns. Stunning.
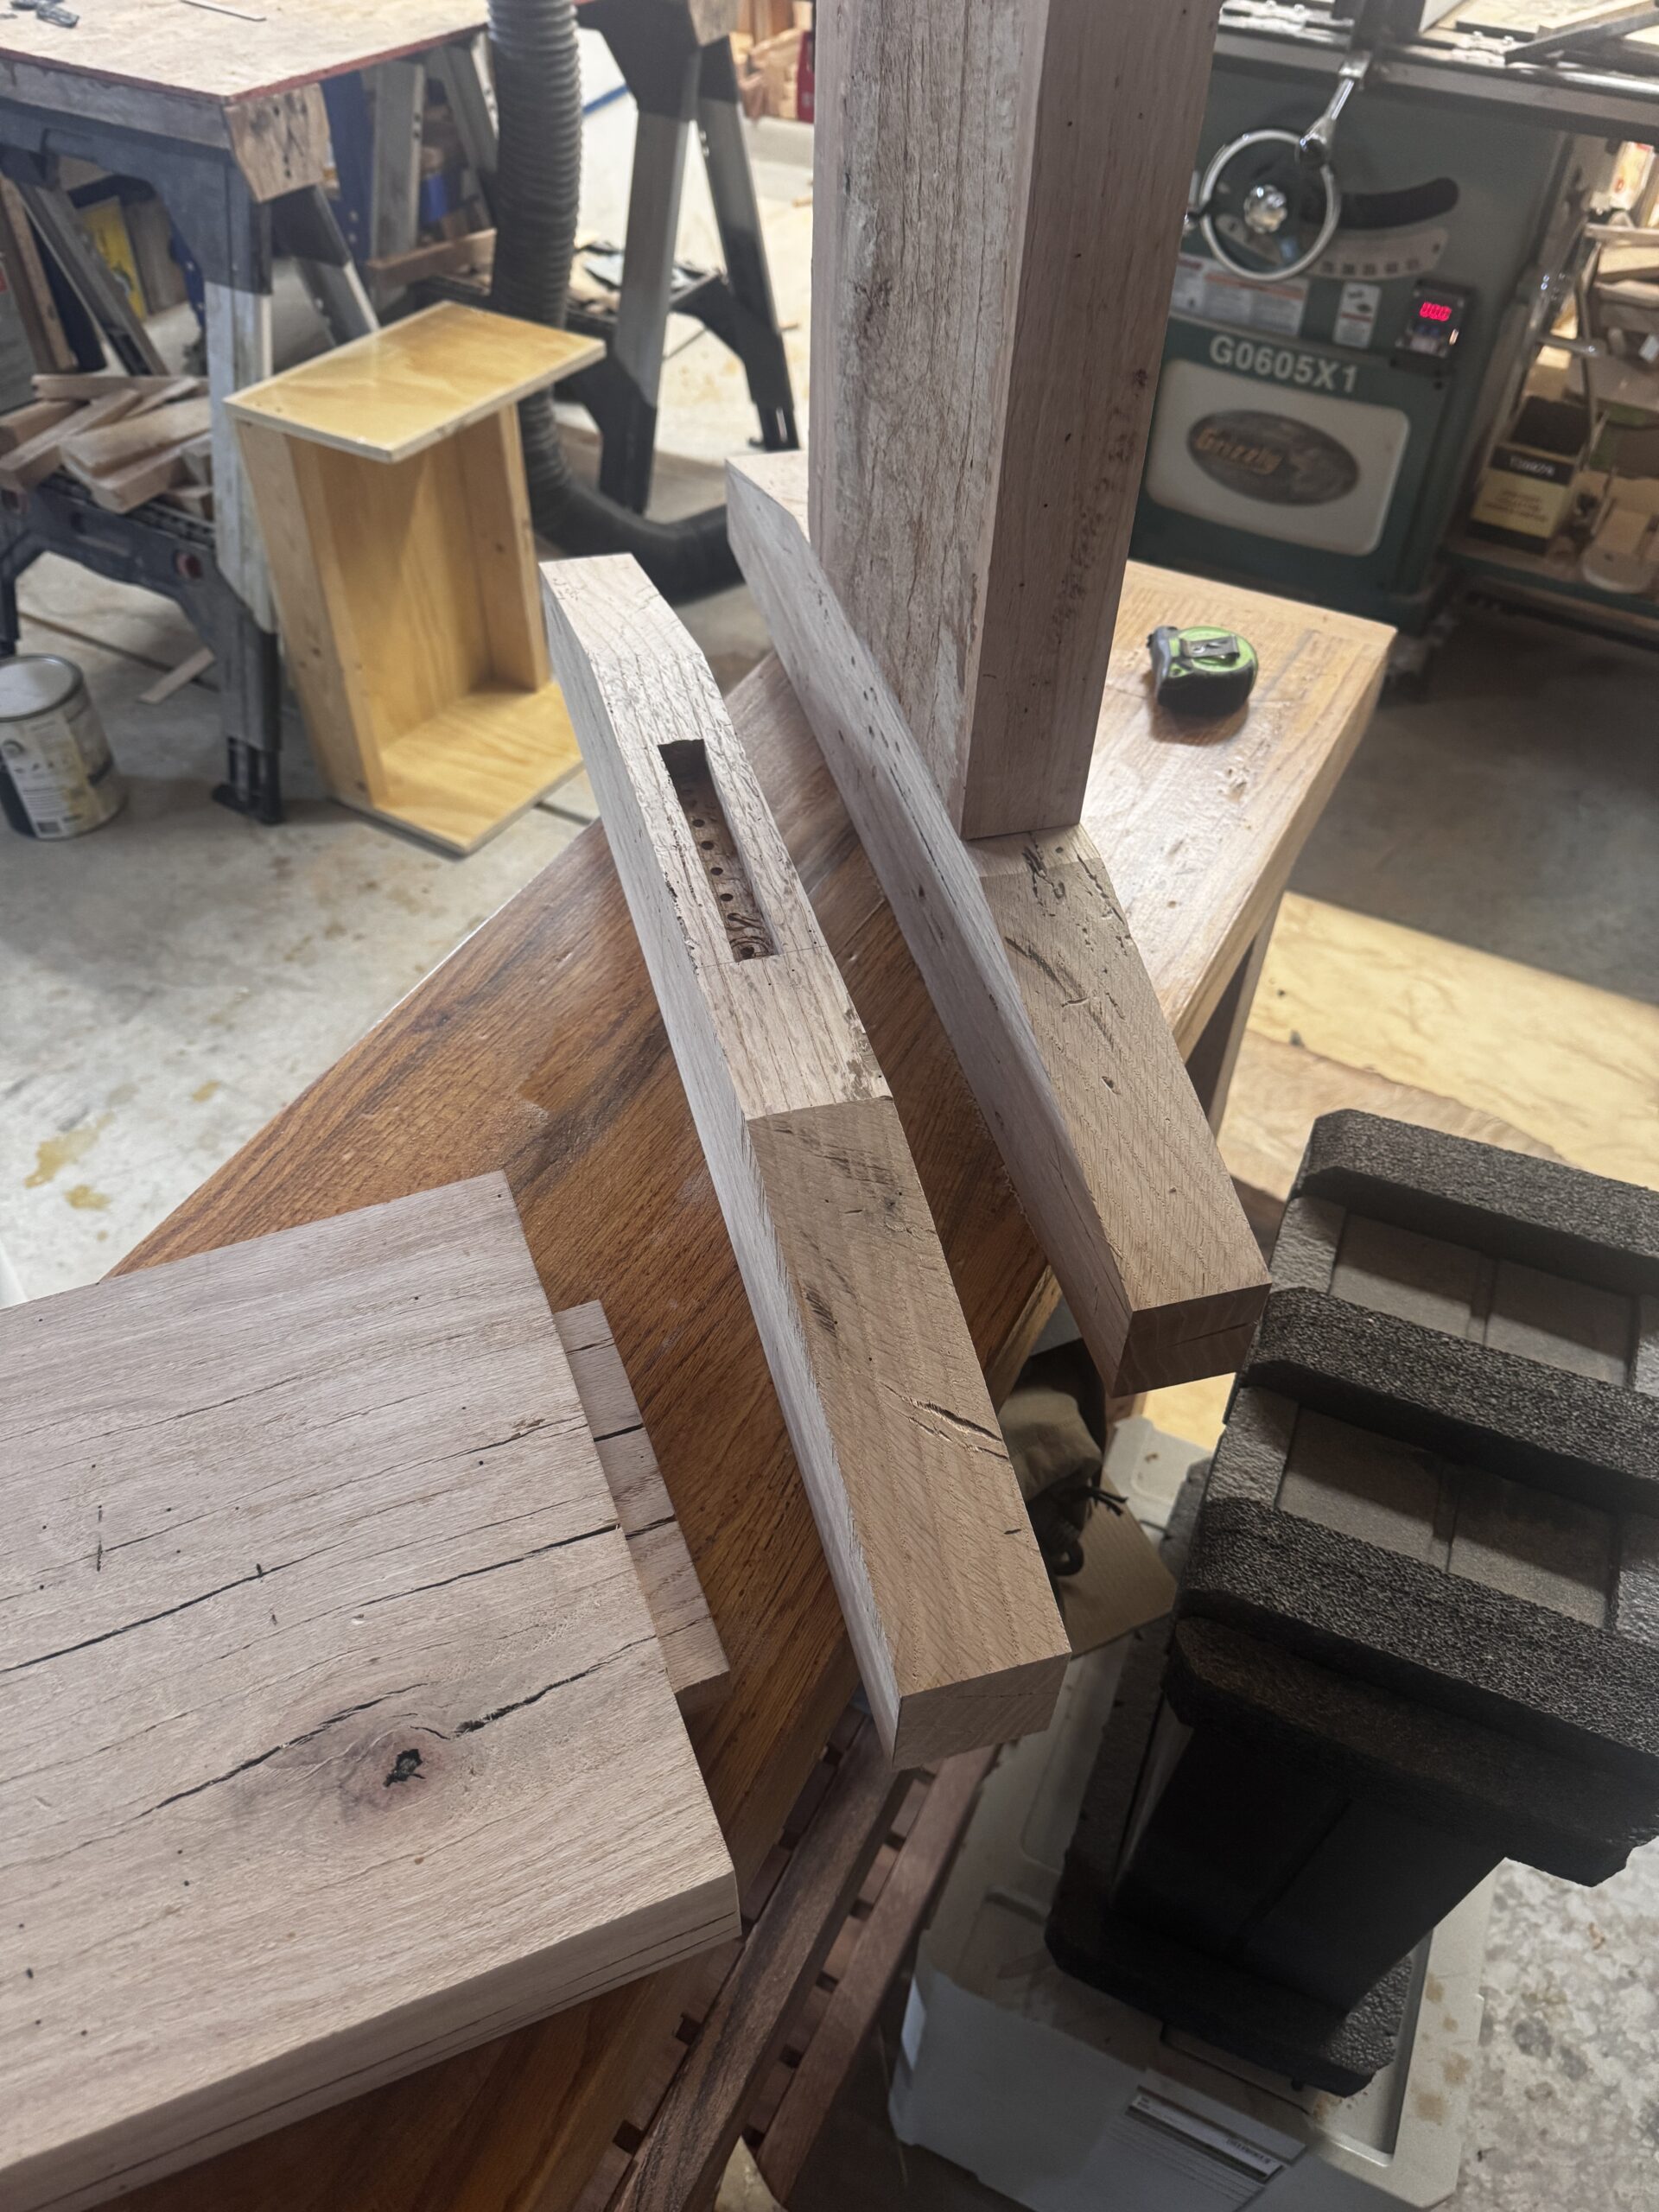
Mortise & tenon technique on leg parts.

Aligning the base
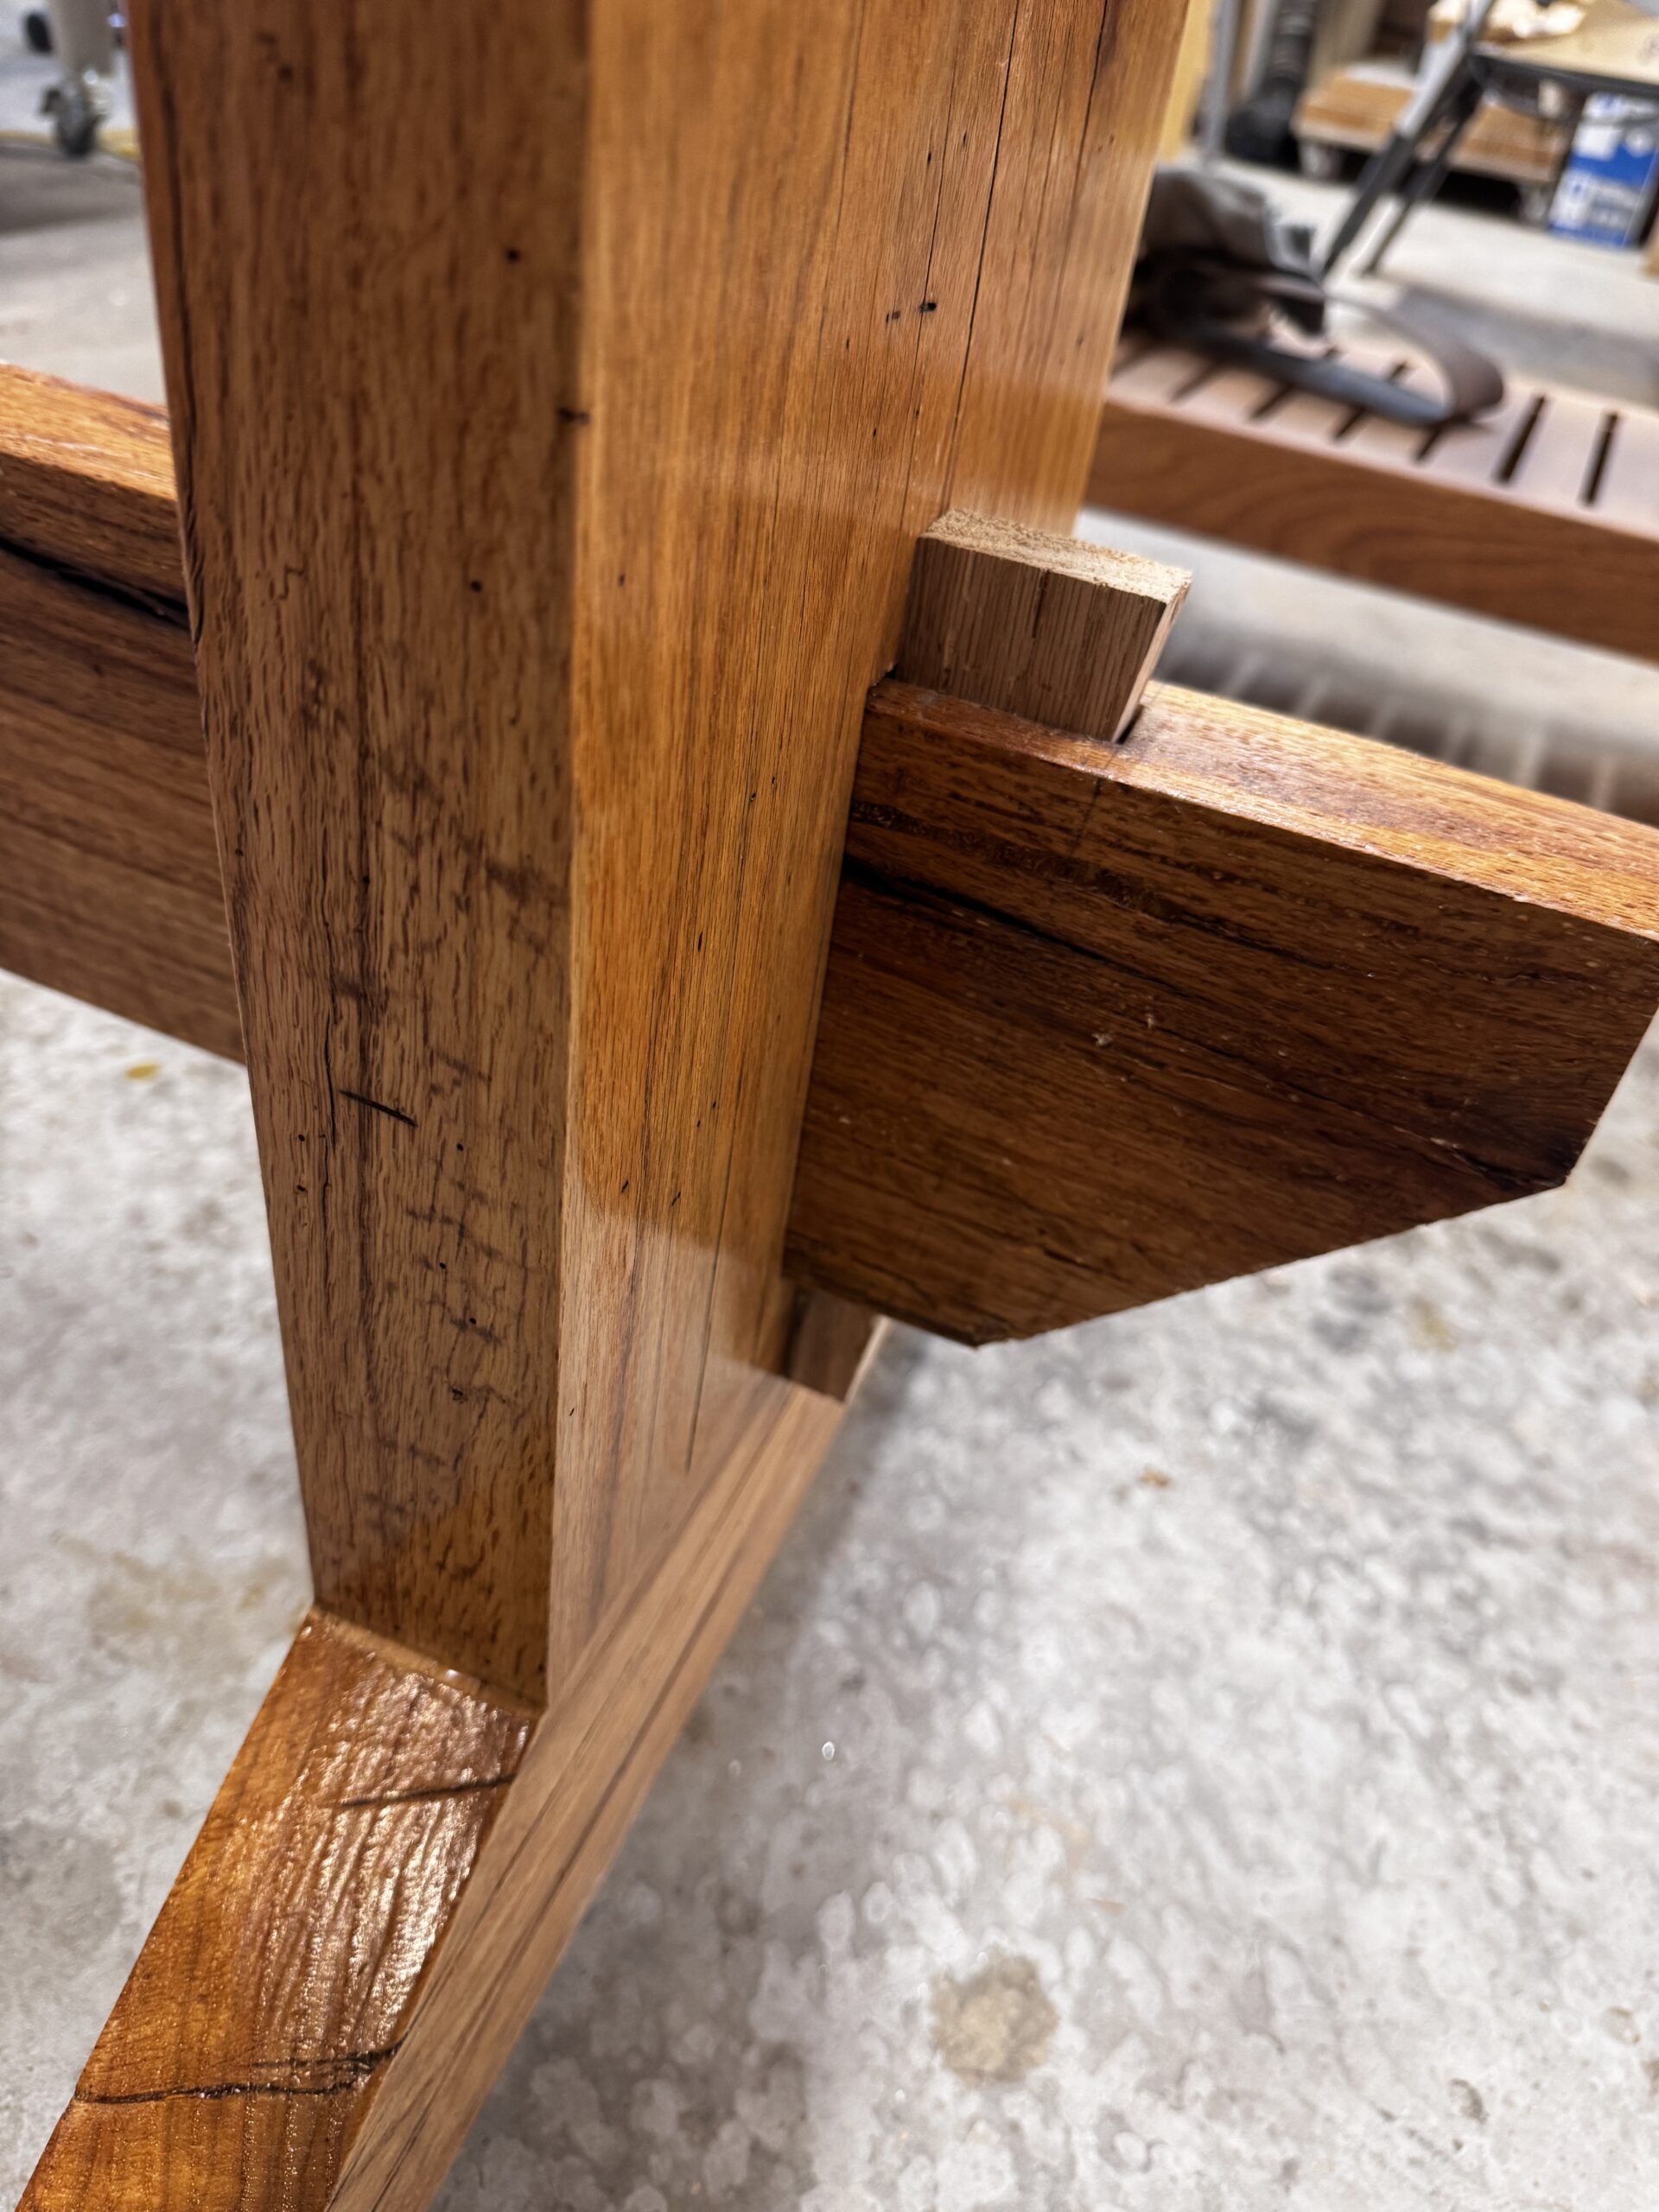
7.5 degree beveled pins hold the legs tight to the trestle beam. Pop these out and the whole table comes apart!
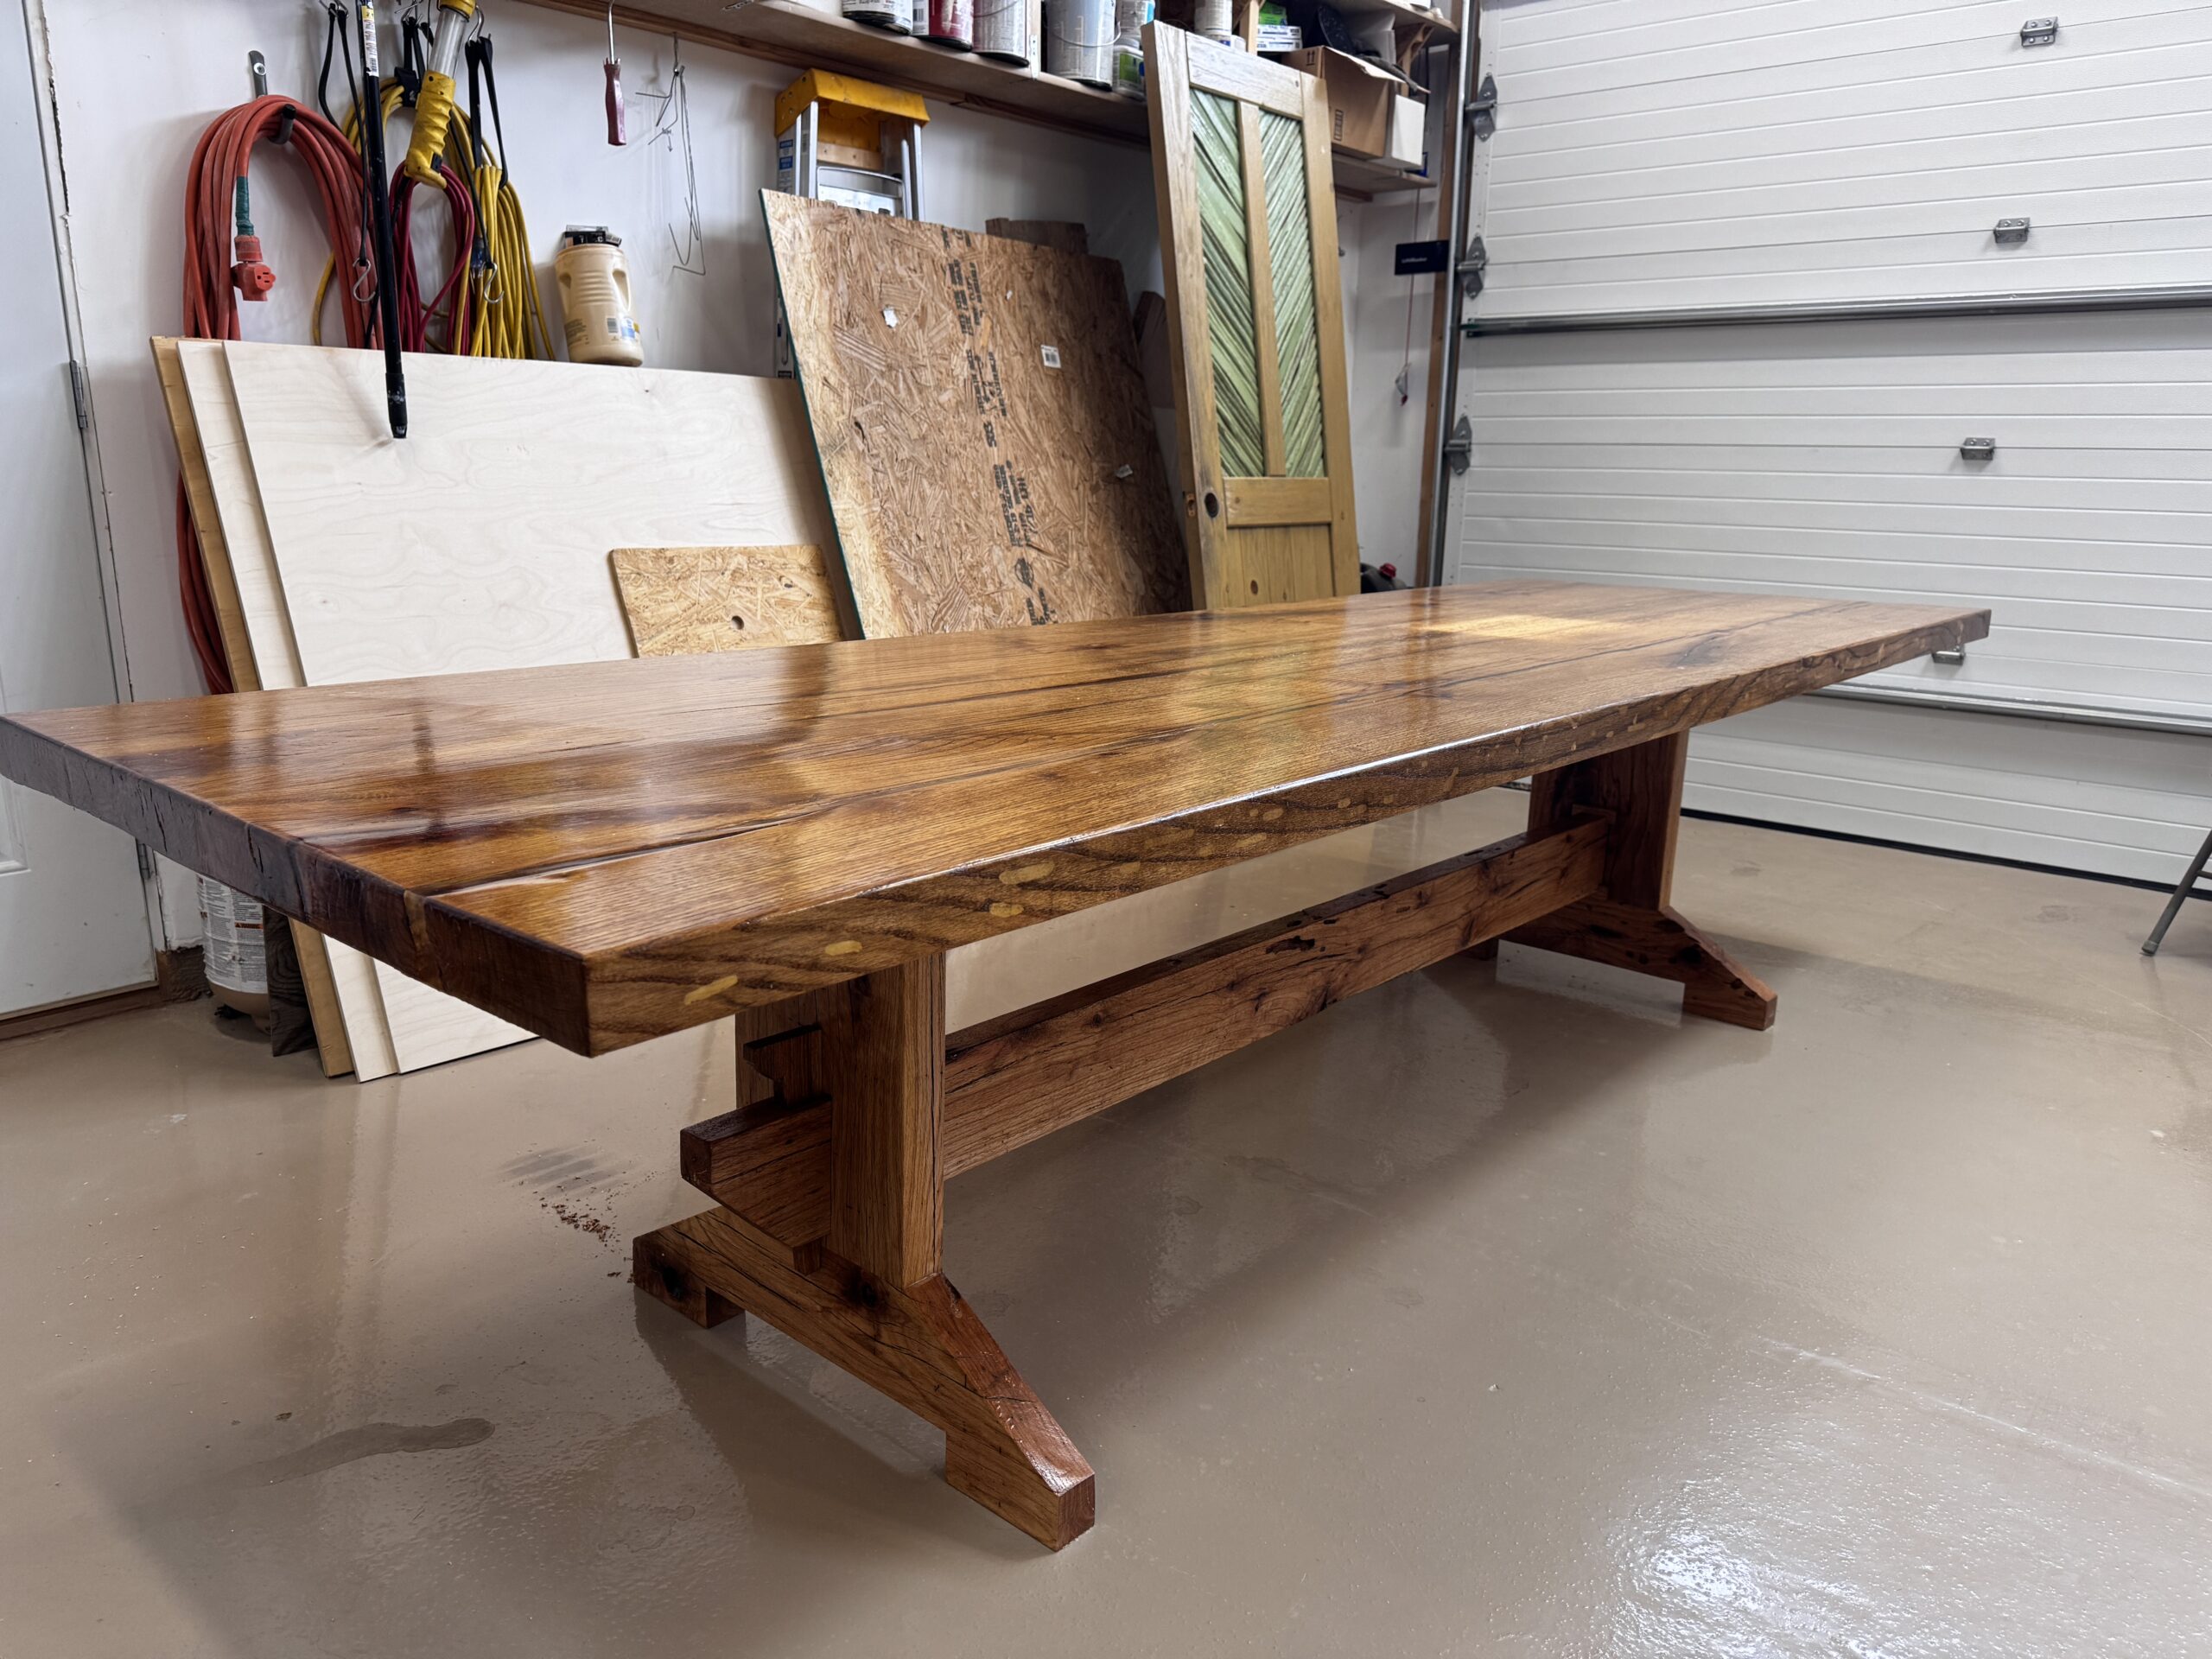
After finishing, table is ready to move from shop to patio. Notice the oak borer holes in the edge of the slab. The borers leave sawdust trails through the sapwood as they eat away at the solid wood. Here I filled the holes with epoxy to maintain this distinctive attribute of the slabs.
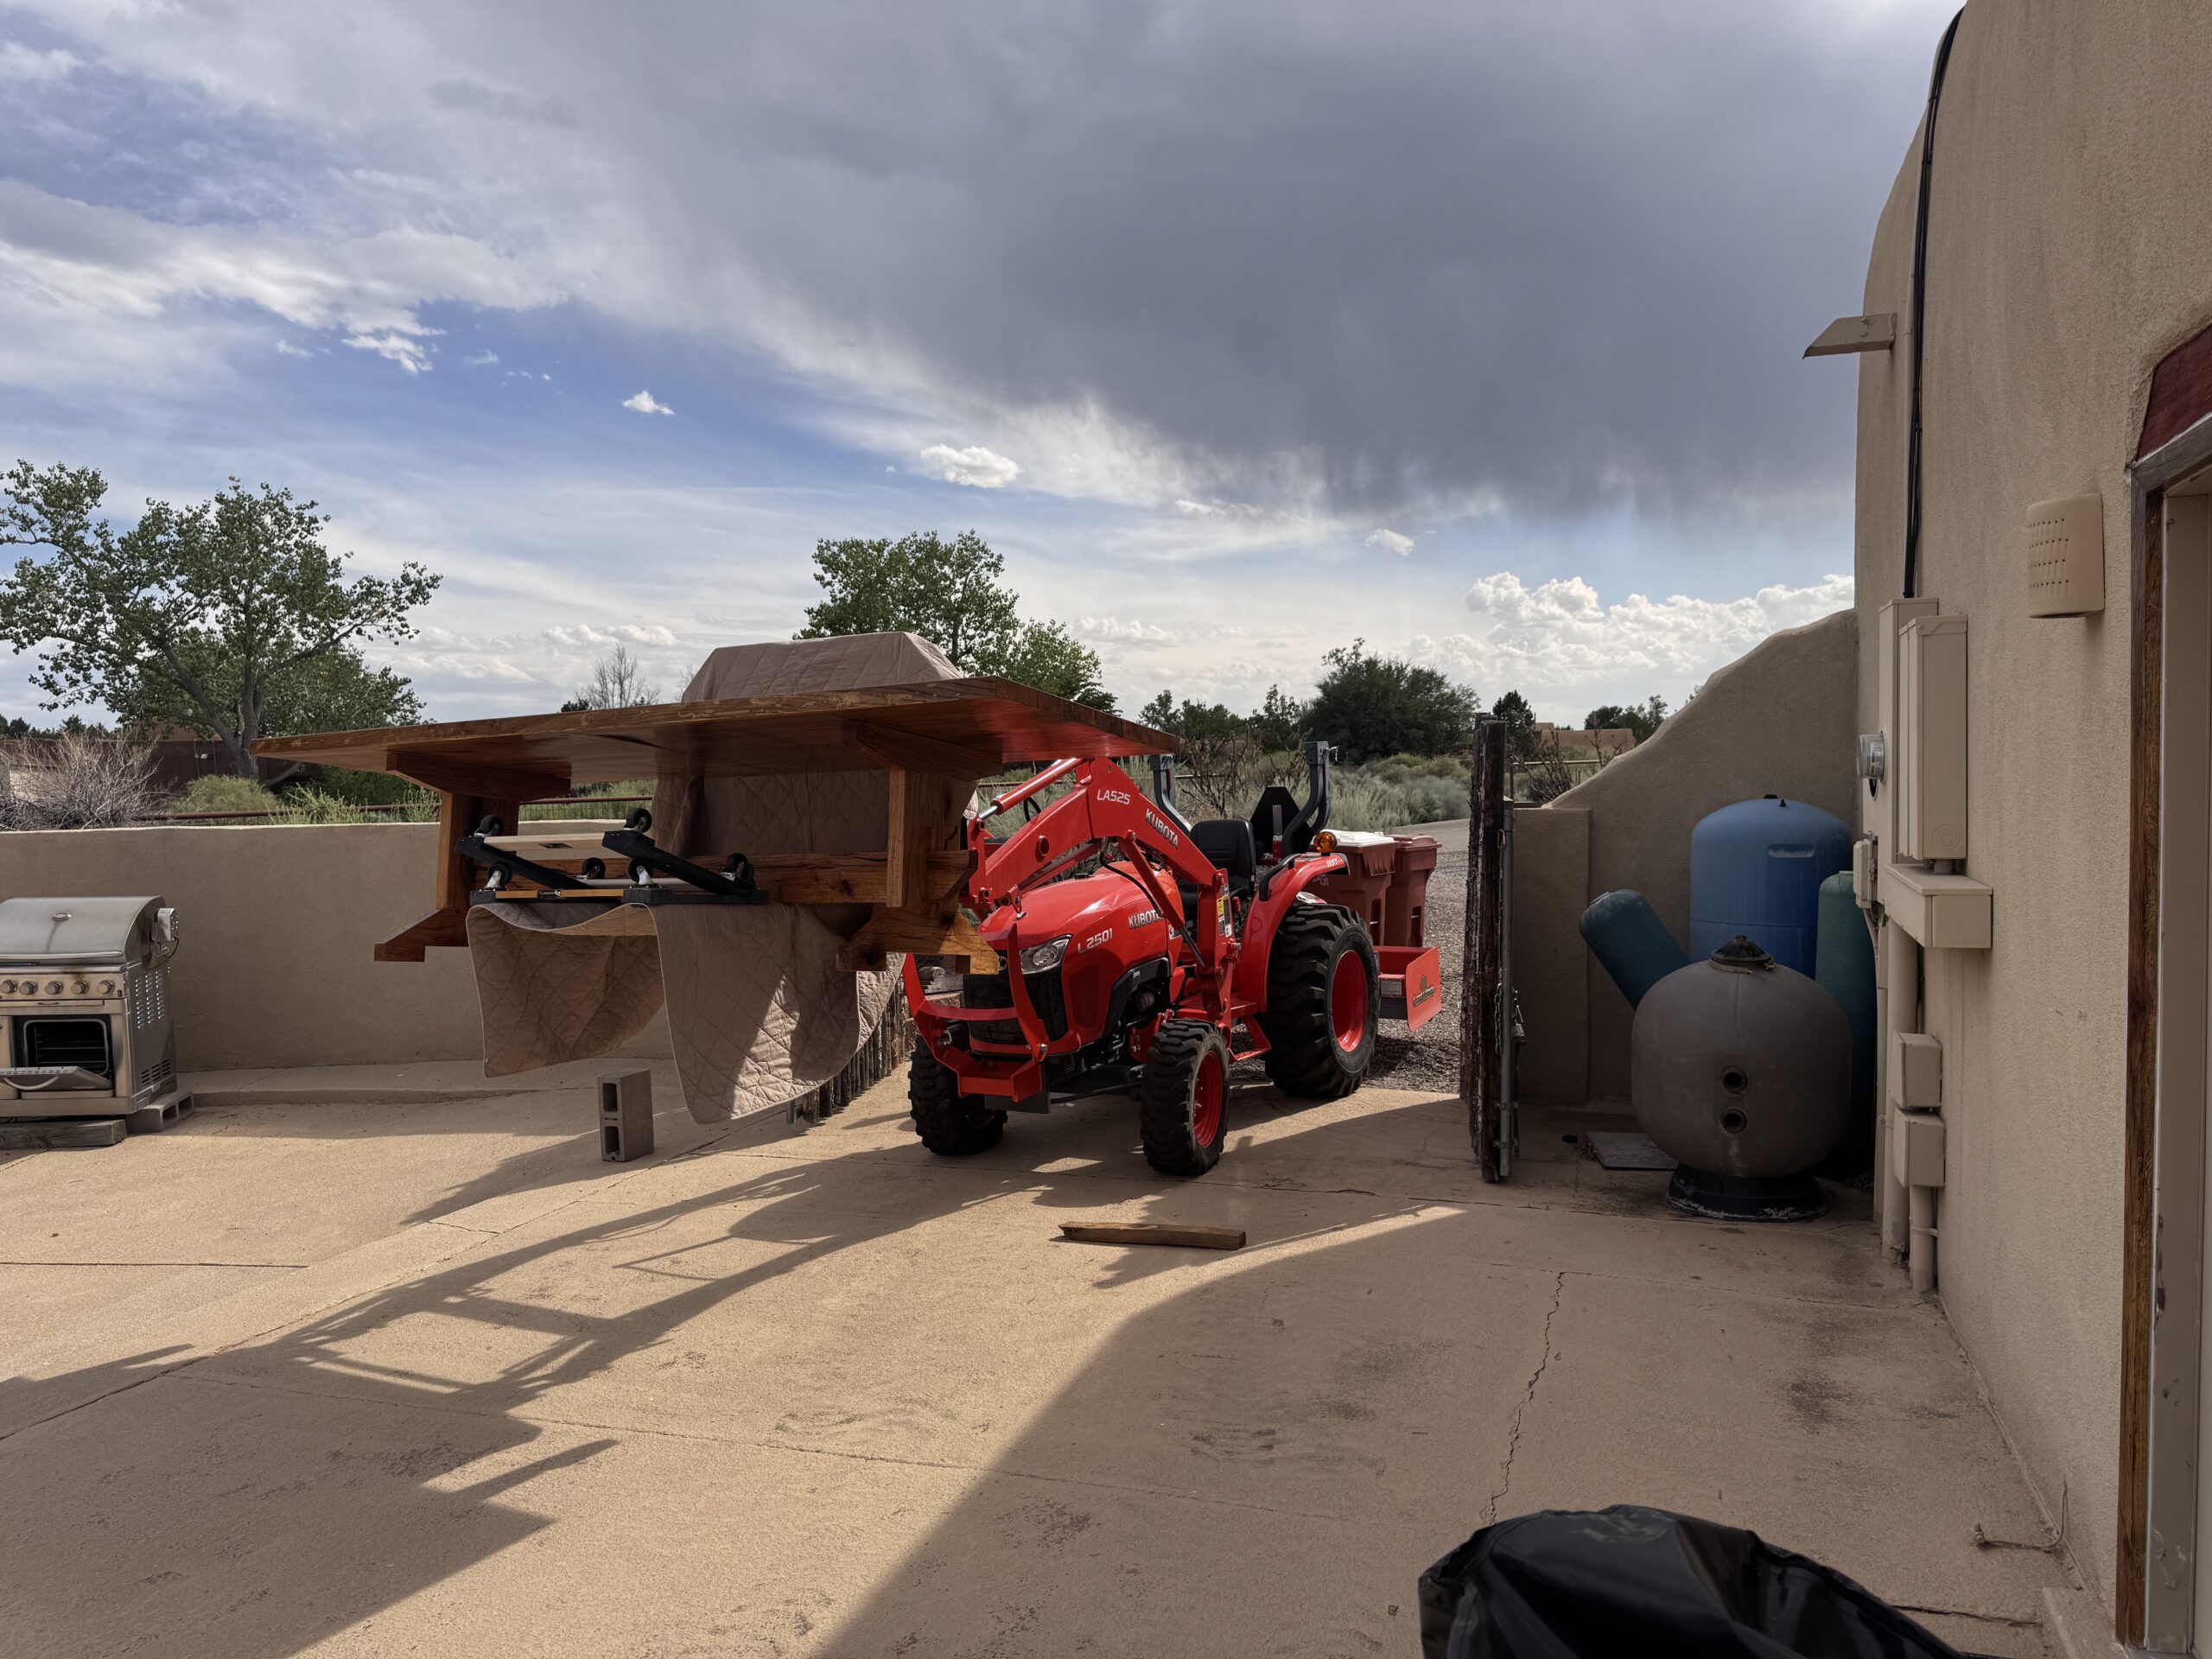
Tipping in at around 450 pounds, this required me to get some strong help to get it moved into place. Mr. Kubota never complains and is always ready to lend a hand. He set her down on a couple of furniture dollies and I rolled it right into its final resting place.
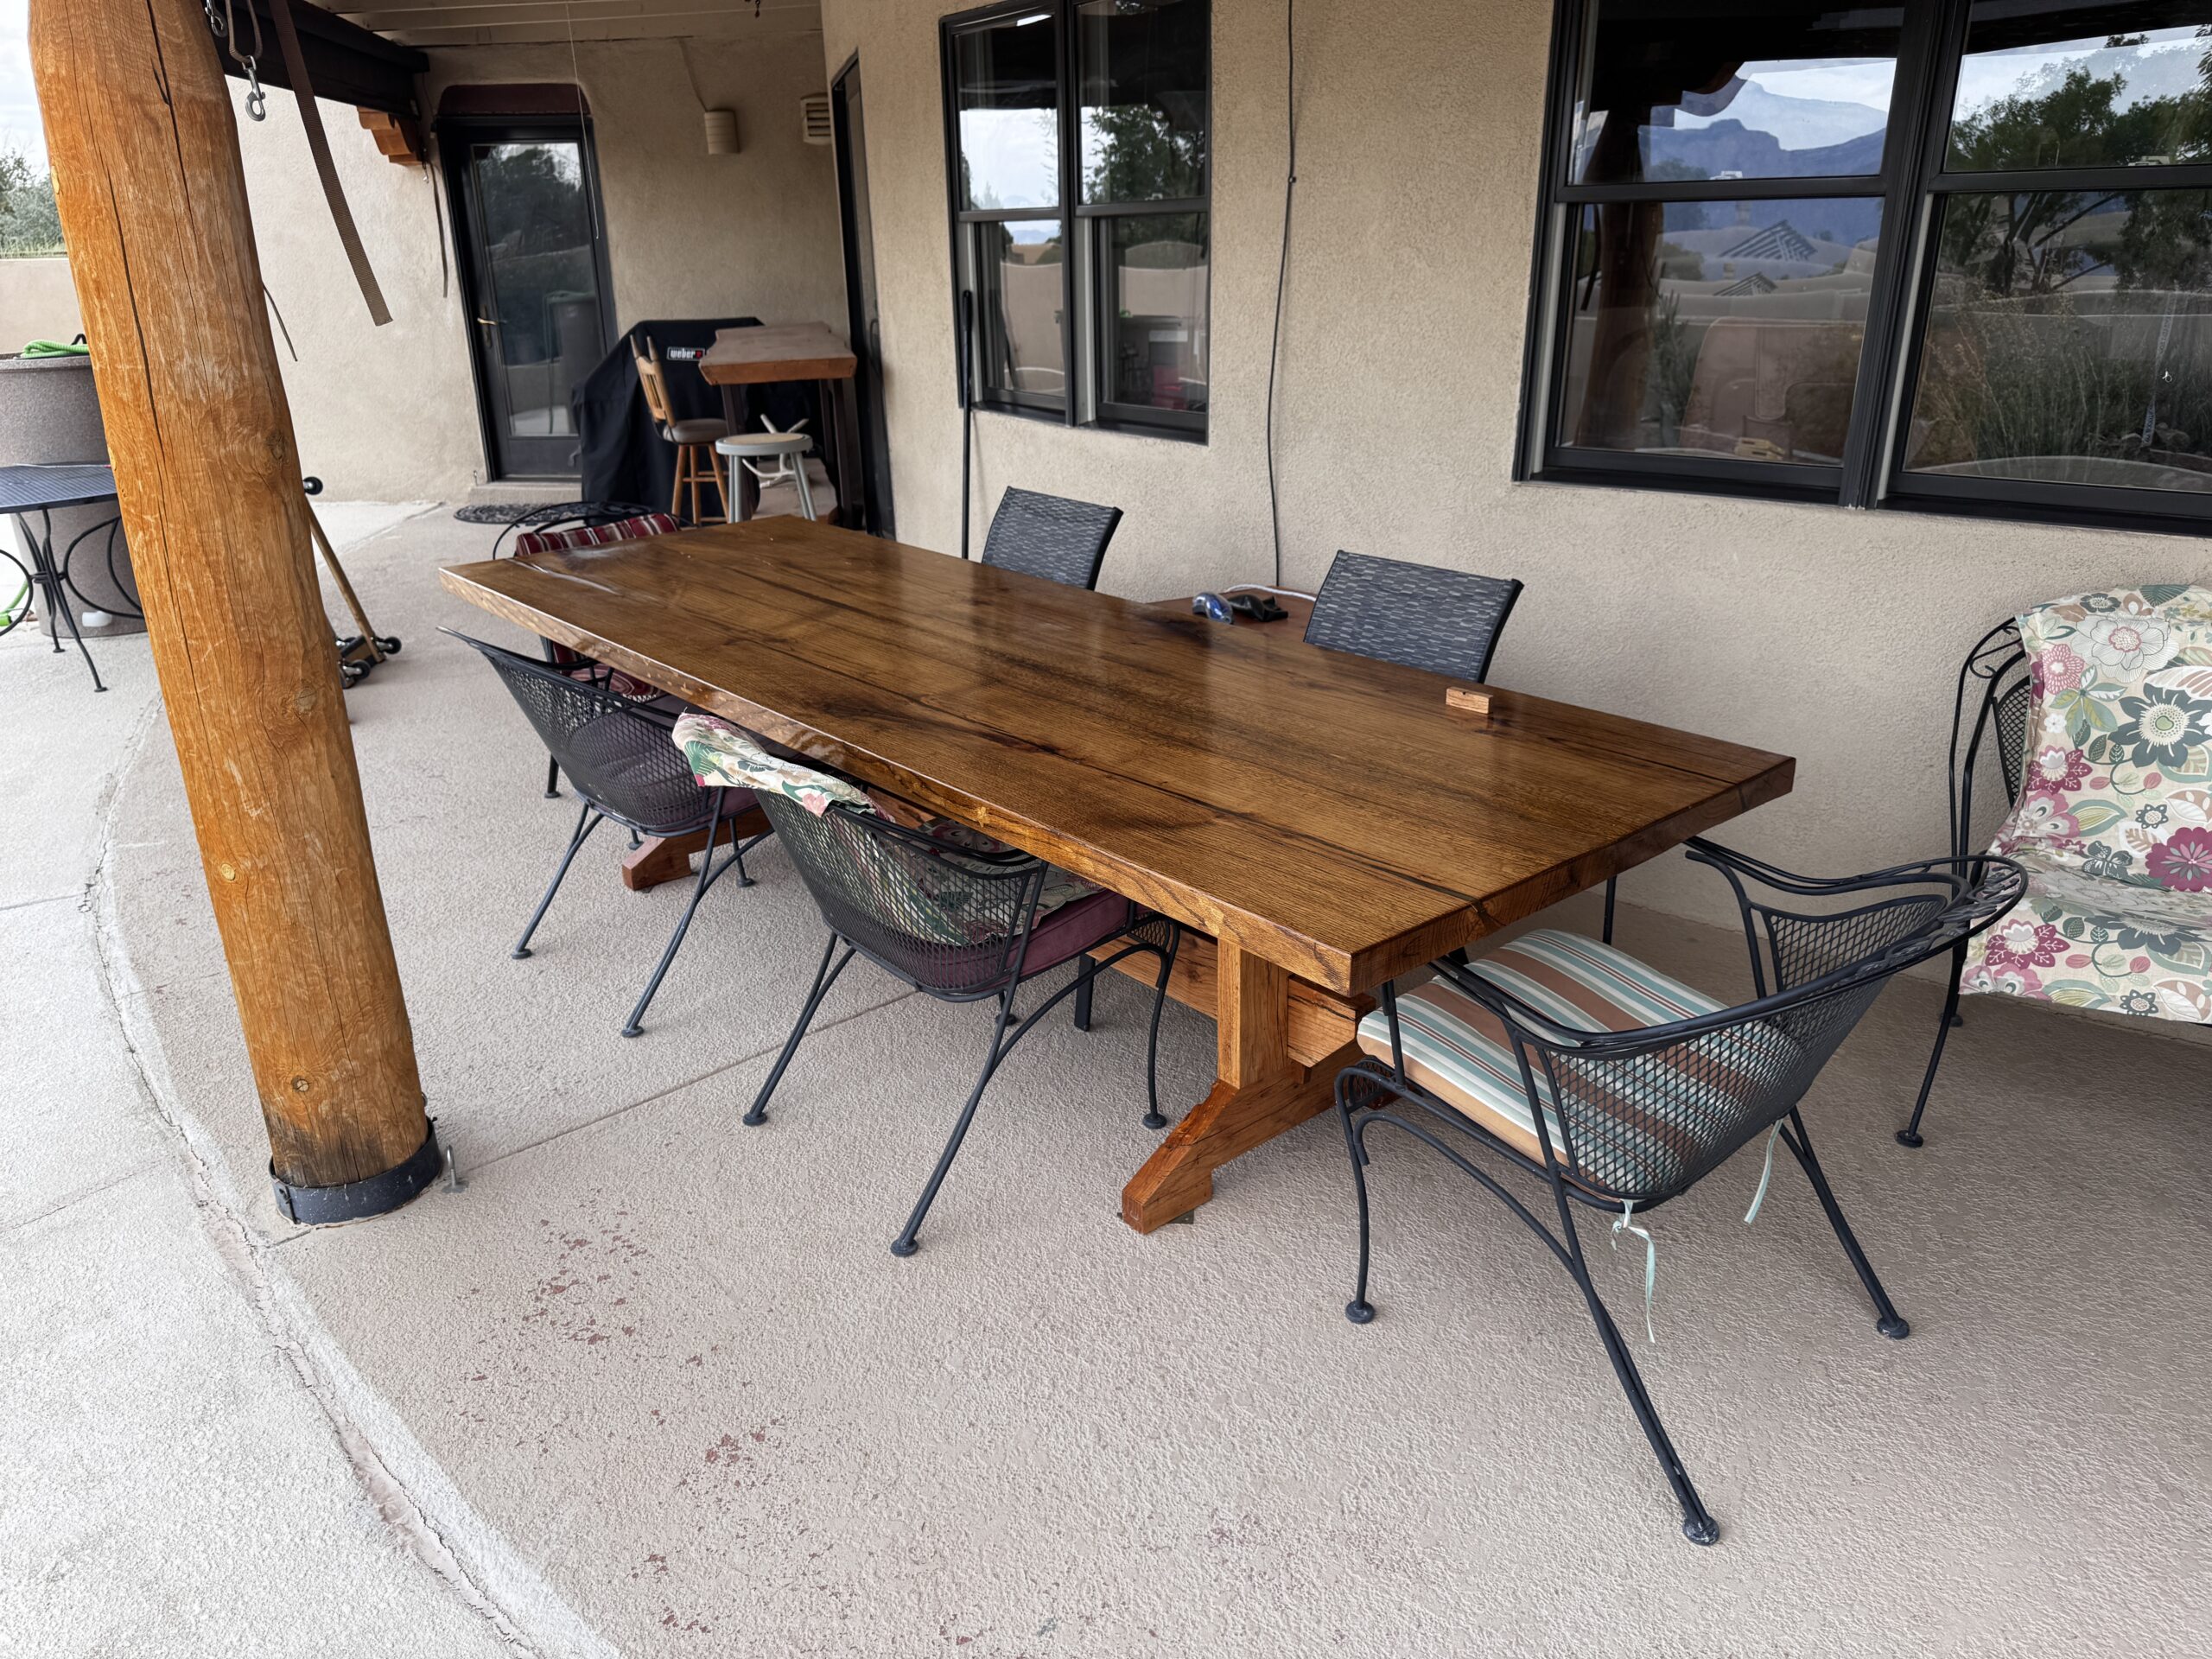
The red oak trestle is going to be our patio table. We’re seating 6 here now but the table can handle 10 easily. I’ll bring it back into the shop this winter to apply the final epoxy coating to the top. Applying epoxy here in the summer in an un-airconditioned shop doesn’t work very well as the epoxy I use sets too fast to adequately finish such a large surface.
This is just a little piece of Mississippi on a patio in New Mexico.